Rapid Prototyping with SLA
What is Stereolithography (SLA)
Stereolithography(SLA) is the most widely used rapid prototyping technique and it produces the finest surface finish and dimensional accuracy in comparison to other additive manufacturing (AM) or 3D printing process.
SLA was the first patented and commercialized 3D printing process. The term Stereolithograhy was used by Charles Hull, who patented the technology in 1986 and founded a company called 3D Systems.
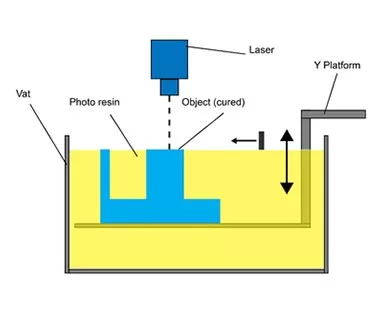
SLA uses an ultraviolet (UV) laser and x-y scanning mirrors on computer-controlled galvanometers. The system scans and the UV laser hardens the top surface of the photosensitive liquid resin that is contained in a vat to create the desired 3D shape.
The SLA 3D Printing Workflow
1. Software Preparation
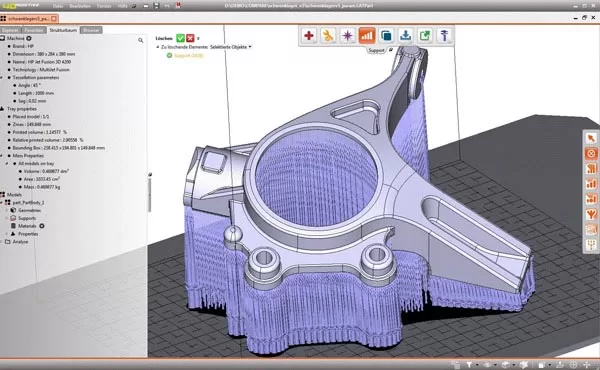
Schematic Diagram of Software Preparation – Courtesy of additivemanufacturing.global
The process starts with 3D CAD drawing preparation. Design your model and export it in a 3D printable file format (commonly .STL). Part orientation will be optimized in the virtual simulation platform in the dedicated 3D printing software. Once the supports are generated, the software will then slice the model into cross sections. Each cross section represents a layer in the build. Once setup is complete, the file will be transferred to the printer via a wireless or cable connection.
2. Printing
Schematic Diagram of SLA Printing Process – Courtesy of Loughborough University
The UV laser precisely cures and hardens on top of the photosensitive liquid resin in a vat. The platform moves down a layer and the paddle or blade sweeps across the surface of the resin to break the surface tension of the liquid and also to control the layer thickness. The process continues until it finishes the part. The machine can run unattended until the print is complete.
3. Post-Process
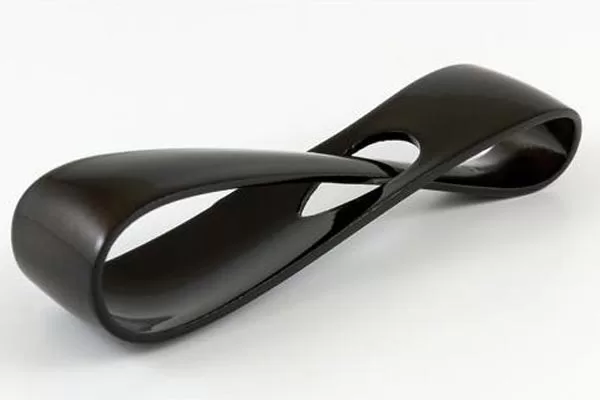
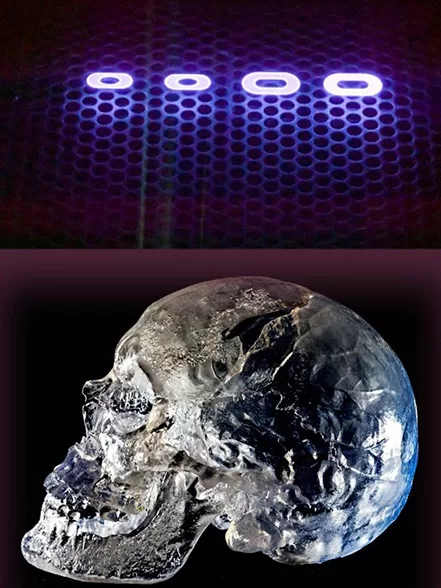
Pictures of SLA part surface finish. Post processes include supports removal, sanding and then painting with high-gloss paint. – Courtesy of Materialise
Once the printing is finished, the SLA parts will be removed from the build platform and rinsed in isopropyl alcohol (IPA) to remove any uncured resin from their surface. Some materials require post curing to improve the mechanical property and dimension stability of the part. The supports will then be removed from the part. Further sanding or grinding is needed to remove the remaining support marks.
The SLA part can be easily machined, primed, painted and assembled for specified applications or finishes.
Why Choose SLA 3D Printing
1. Finest Features, Smooth Surface Finish and Complex Geometry
SLA benefits itself from its extremely high quality of surface finish and finely detailed features comparable to other 3D printing processes. Since the parts can easily be sanded, polished and painted, the post processing time can be reduced dramatically.
SLA also can produce high complex geometrical shapes that can’t be done by traditional manufacturing methods such as machining, plastic injection molding and extrusion.
2. Accuracy and Precision
SLA provides the tightest tolerances of any other additive manufacturing processes. The high tolerance of the SLA process mean that it is ideal for producing fit-form prototypes that are used to test products before committing to the chosen method of production.
3. Material Versatility
SLA resins have the benefit of a wide range of formulation configuration. The material can be soft or hard according to each application. For example, the material range can be specific or to those that closely match the mechanical properties of the molded part.
Unlike the traditional SLA system, nowadays, newly emerged SLA machines offer a wide range of thermoplastic-like materials to choose from, such as ABS-like, PP-like, PC-like , PP/ABS-like, etc. However, please be aware that if the SLA part is left in the sun or exposed to UV for a few months, it will degrade and will not provide the same strength and durability as parts that are machined or molded.
Comparison with other AM Techniques
1. SLA Vs FDM
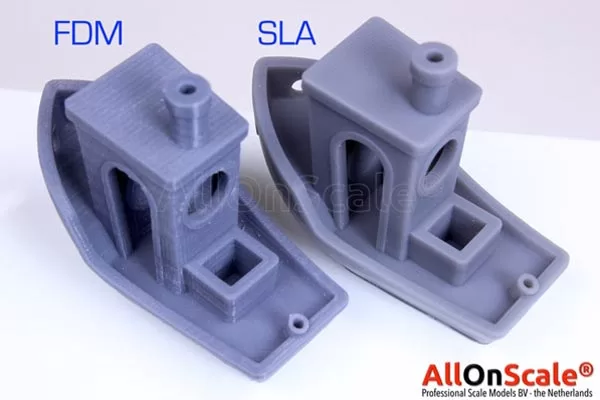
SLA VS FDM
a) Surface Finish
SLA has a smoother surface finish in comparison to FDM. Layer lines are visible in FDM part. Fine details such as text are more profound in SLA due to the laser spot size of less than 0.1mm in comparison to approximate 0.4mm nozzle diameter of FDM printer.
Hence, if high precision and smooth surface finish are the major concern, SLA will be the best-fit process to fabricate your part.
b) Cost
FDM printers and its materials cost are comparatively lower in comparison to SLA. In SLA, the resin is about twice as expensive than FDM’s material. Hence, FDM parts are relatively cheaper if compare to SLA.
c) Durability
SLA part will degrade over time especially when it’s exposed to UV light. Hence, if durability plays a role, FDM process will be the first choice for printing your part.
2. SLA Vs SLS
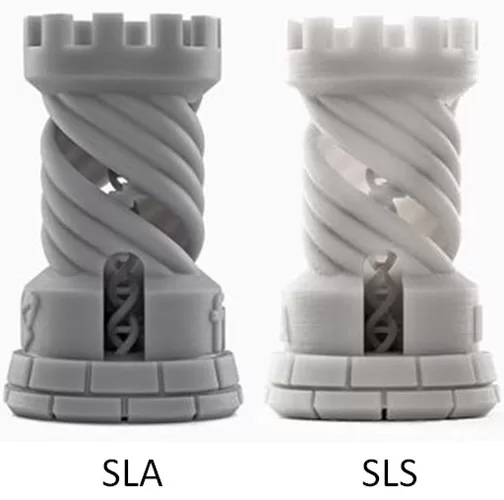
SLA VS SLS – Courtesy of Zeal3Dprinting
a) Surface Finish
Due to SLS is utilizing powder bed technology, the partially fused powder will attach to the surface of the part. Hence, the SLS surface finish will be rougher if compared to SLA.
b) Cost
SLS powder is much more expensive than SLA resin. Hence, if the cost is major concern, SLA will be the best choice.
c) Complex Shape and Mechanical Strength
Supports are not required in SLS process. Hence, SLS can print high complex geometry of part without taking consideration of internal supports that can’t be removed. Also, detailing can be fairly high in SLS.
SLS part is strong and durable. Most of the time SLA part is for conceptual model purpose only and not suitable for functional test in comparison to SLS part.
Hence, if high mechanical strength and complicated geometries are your top priorities, SLS is your best selection to manufacture your part.
