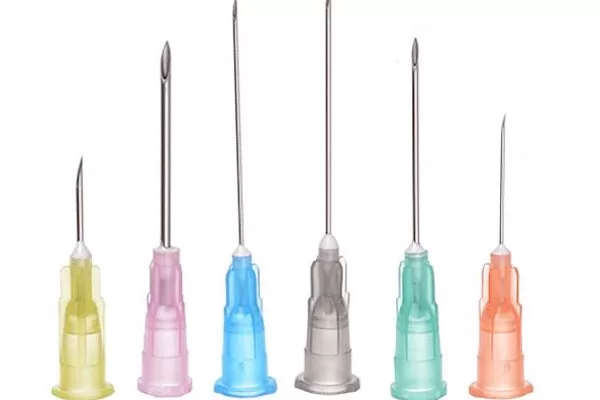
Have you ever wondered about the hypodermic needles manufacturing process? As a doctor slips a 21-gauge needle into your vein, you find yourself amazed at how they can create such a small tube with a razor-sharp edge.
Precision manufacturing is an advanced business model, and there are only a few OEM hypodermic needle manufacturers. This medical equipment must meet stringent international quality standards such as ISO 13485 and CE Mark, with the FDA being a huge player in setting quality control standards.
The manufacturer must keep everything in-house, integrating their systems to ensure optimal product quality. This post looks at the manufacturing process for hypodermic needles from start to finish.
Fine Injection Tube Manufacturing
Hypodermic needle manufacturing technology has advanced since Francis Rynd administered the first hypodermic injection in 1844 in Ireland. Today’s finished fine tube products and the processes of polishing and coating are defined as the “Japanese Quality” standard.
The fine tubing used in hypodermic needle manufacturing is stainless steel, known for its strength, sterility, and corrosion resistance. The needle manufacturing process rolls stainless steel sheets into tubes, welding the seams.
The floating process reduces the wall thickness and diameter to the required Birmingham gauge for the finished product. This process requires specific manufacturing experience and knowledge to ensure a high-quality design and finishing of hypodermic needles.
The basic step-by-step process of manufacturing fine tubes used in hypodermic needles encompasses the following four components.
- Acceptance material inspection.
- Fine tube manufacturing.
- Floating.
- Crack inspections.

Hypodermic needle
Fine Tube Fabrication
The manufacturer will anneal the stainless-steel sheet to alter its hardness to the required level suitable for hypodermic needle manufacturing.
The drawing process of pulling the tube adjusts the wall thickness and diameter by passing it through a die in a straightening machine to ensure a perfectly straight tube before cutting it to length using automated processes to ensure accuracy and the best results for quality standards.
Inspection rates for straightened stainless steel tubes are typically 6 in 5,000. The manufacturer will keep one sample as a batch reference and inspect the other five. The wall thickness and diameter of the cut stainless steel tube can differ to suit the gauge requirements for medical applications.
The manufacturing steps involved in the process encompass the following.
- Annealing the stainless steel sheets.
- Drawing the material.
- Straightening the tube.
- Cutting to length.
- Quality inspection and batch control.
Fine Tube Inspection
The cut straight tubing goes to the inspection room before being released into the production process. The inspection team, staffed by experienced quality control technicians, looks for scratches, twists, kinks, and contamination in the finished product before approving it for the next manufacturing step.
Deflection angles, wall thickness, and diameter are all measured accurately during the inspection. The team looks at factors like bend strength, breakage resistance, appearance, inside diameter, and elasticity.
The team records all testing and inspection results during the process. They examine the final products’ uniform integrity and quality relative to the set specs. This sampling inspection process looks for the following in the finished product.
- Breakage resistance.
- Flexibility and strength.
- Elasticity.
- Appearance.
- Inside diameter.
Hypodermic Needle Fabrication
After the initial quality inspection, the stainless steel tube goes to the next manufacturing phase. The manufacturer grinds the tube to form the needle tip using a high-speed grinding wheel. This process creates microscopic burrs around the edge of the needle, which the manufacturer removes with an electrolytic process.
The needle is then treated to protect the outer and inner surface and cleaned to the base stainless steel surface before being sent to the clean room for the next phase. Manufacturers will fabricate the needle tips according to the customer’s requirements.
Needle Assembly
The manufacturer assembles the needle head in a clean room, with the final quality inspection phase looking at the tip or “cannulas” after the final cleaning and deburring stage. The manufacturer glues the hub and cannula together and sends it for final coating and cap attachment.
All manufacturing processes are entirely automated, with a human inspection team reviewing the finished products before sending them to logistics for distribution. The assembled needle head receives a final inspection for puncture resistance and adhesive strength before being sent for distribution.
Hypodermic needles must have low penetration resistance to reduce pain during skin puncture. The final inspection process involves looking at the following.
- Needle tips.
- Damaged cannulas.
- Defective needles.
The sampling process involves the following steps.
- Adhesive strength.
- Skin puncture resistance.
- Needle bend.
- Appearance.
Packaging, Boxing, & Sterilization
The final needles are packaged in sheets of ten, inspected again, and packed in ten sheets per box. The box undergoes a sterilization process before being sent to the logistics department for shipping to countries around the globe.
The manufacturing of hypodermic needles is a highly controlled and inspected process. OEMs must evaluate every step of the manufacturing process to ensure their product meets the highly coveted standard of “Japanese Quality.”
