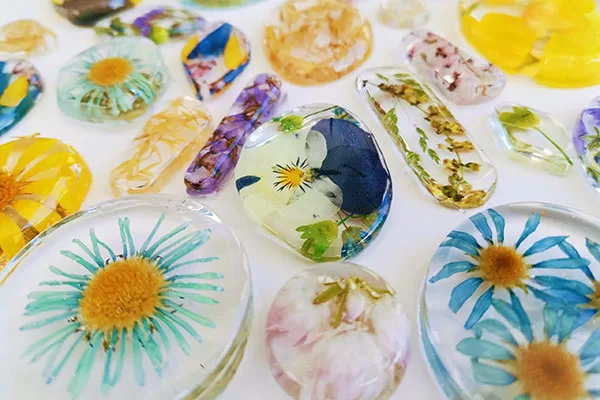
Do you dream of creating unique and captivating jewelry? Are you looking for a new craft that will let you express your creativity?
If so, resin jewelry making is the perfect way to turn your artistic vision into reality. With the right tools, techniques, and knowledge, you can craft beautiful pieces of jewelry that you can be proud of.
This blog will teach you all the skills and methods necessary to make beautiful jewelry. We will teach you everything you need to know to make beautiful and unique jewelry pieces, from the basics of mixing and curing resin to advanced techniques like embedding and color mixing.
So get ready to unleash your inner artist and learn this art.
Unleash Your Creativity with Resin Jewelry Making
Resin jewelry making is a unique and fascinating art that has gained immense popularity over the past few years. It offers endless possibilities for creativity, and the final product can be a stunning piece of jewelry that is beautiful and durable.
If you want to get into resin jewelry making, you have come to the right place. In this article, we will share with you some expert tips and tricks to help you create stunning resin jewelry with molds.

Resin jewellery
Essential Tools and Materials for Resin Jewelry Making
Before starting resin jewelry making, it’s important to ensure you have all the right tools and materials. The following is a list of the essential tools and materials that you will need:
- Resin
- Mixing cups
- Stir sticks
- Measuring cups
- Mold
- Pigments or colorants
- Glitter or other embellishments
- UV lamp or resin curing station (optional but recommended)
- Gloves
The Step-by-Step Guide to Making Resin Jewelry with Molds
Making resin jewelry with molds is a relatively simple process that can be done in just a few steps. Here is a step-by-step guide to help you get started:
Choose your mold. Molds come in various shapes and sizes, so choose one that fits your design.
Prepare the mold. Clean the mold and lightly coat it with a release agent to prevent your resin from sticking to the mold.
Mix the resin. Follow the instructions on the resin package and mix the resin and hardener.
Pour the resin in to the mold. Carefully pour the resin into the mold, making sure not to overfill.
Add colorants and embellishments. If you add them before pouring, they will become embedded in the resin. If you add them after pouring, they will be on top of the resin. You can use tweezers or toothpicks to place them where you want them.
Let the resin cure. Place the mold in a warm, dry place and allow it to cure for the recommended amount of time.
Remove the resin from the mold. Carefully remove the resin from the mold. You can use scissors or a craft knife to trim away any excess resin or glitter around the edges.
Polish and finish. Use a polishing cloth to buff your resin jewelry and give it a nice finish. You can also drill holes in it or glue the resin onto jewelry, such as buckles, chains, earring hooks, etc.
Final Thoughts
Resin jewelry making is a fun and rewarding activity for both beginners and experienced jewelry makers. With these tips and tricks, you can create stunning pieces of jewelry that will last a lifetime. So get creative and start making beautiful resin jewelry today!
